Wow, the Chelsea Garden Show! London’s late May celebration of spring explodes with botanical prints and patterns, and that’s where NPS member Lauren Milana and I discovered the botanical cast tiles of master artist Rachel Dein. Tucked into Chelsea’s main runway, Dein’s booth overflowed with botanical casts precise and detailed, large and small… the booth was a guidebook to the meadows of Great Britian, but in plaster and concrete.
Is it easy to make a plaster cast of a plant? Yes. Is it easy to make a great cast of a plant, a Rachel Dein worthy cast? No. What makes Dein’s plaster and concrete casts magical is how she composes them to create shadow in the tile itself. I came to this slowly, because at first I thought the magic was in Dein’s process. I finally realized that my choice of plant material was critical to making great tiles.
Here are the basic steps.
Cover your surface with freezer paper. Decide on the size of your tile. I used 8 x 8 or 10 x 10 inch square picture frames at first. Roll out soft clay (I use Aneta white porcelain clay from Dickblick.com) in a flat slab about 1 /2 inch thick, and larger than the dimensions of your frame. Grease inside of frame with a light coat of vaseline and press the frame lightly into the clay.
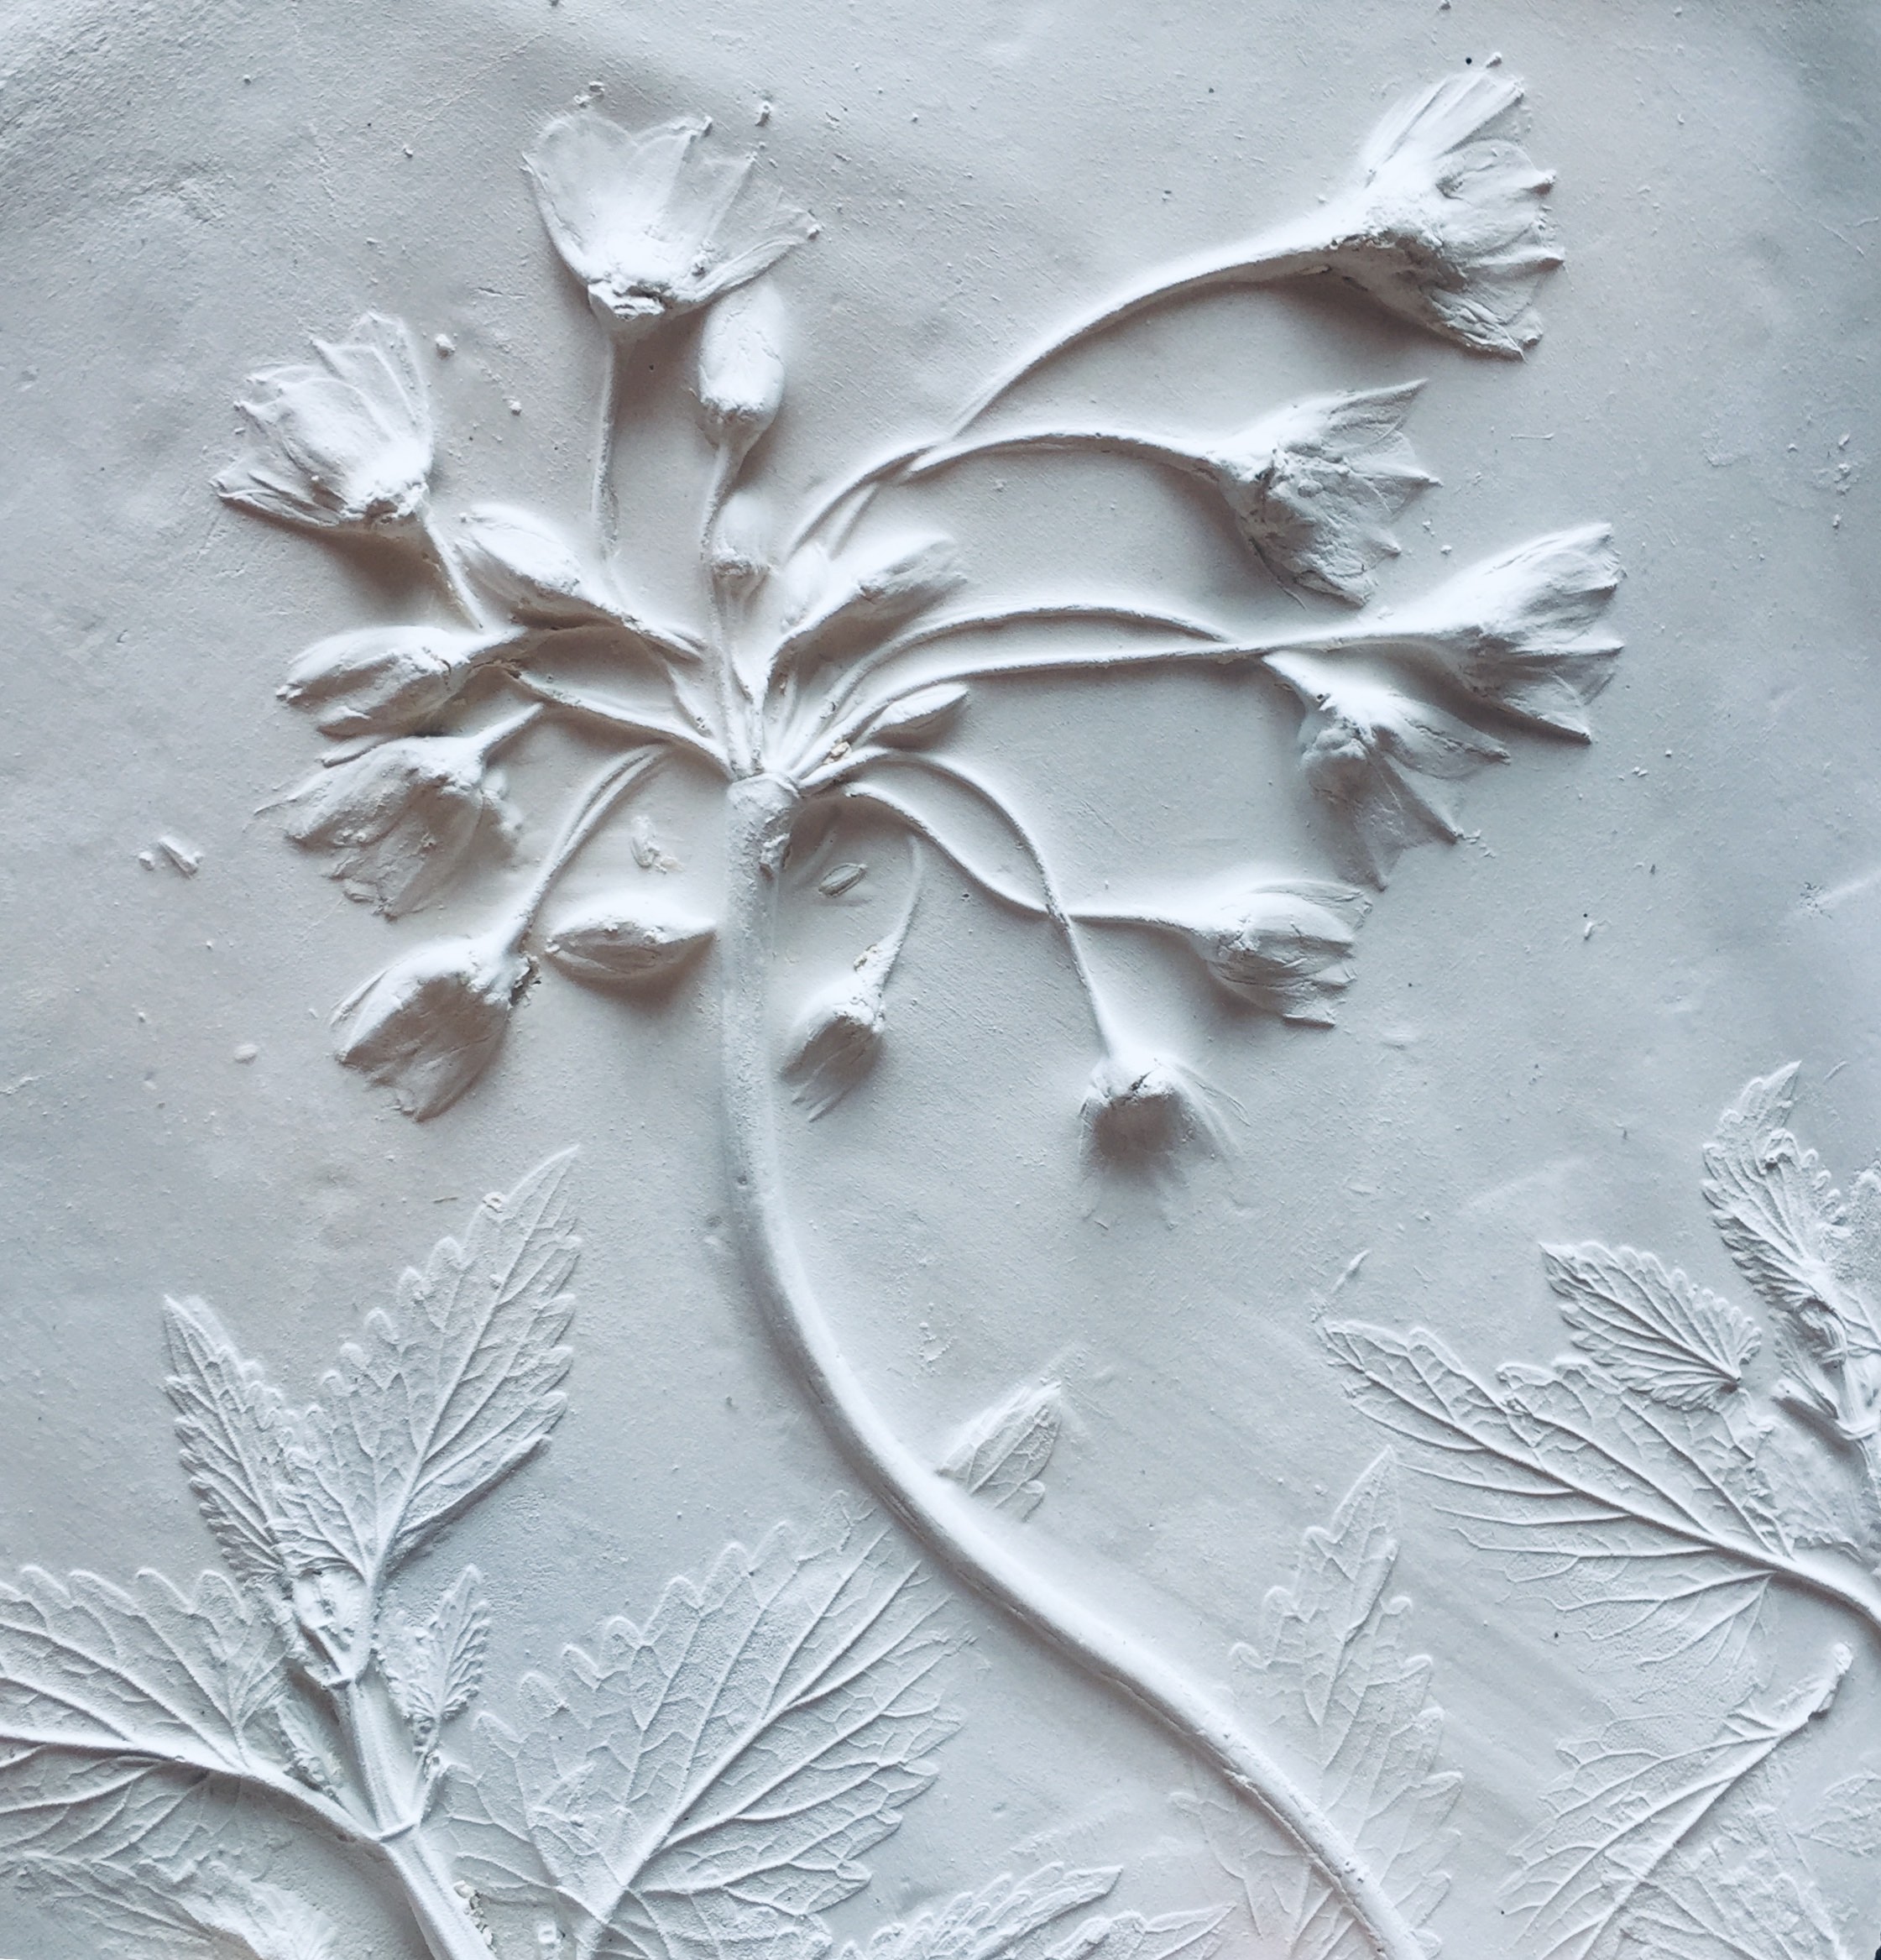
Choose your plant material with an eye to thick and thin, heavy and light. In other words, simple leaves may not be enough to make a magical cast. It is the interplay of a fennel branch or a heavy poppy seed pod against ferns that makes the magic. Lay your plant material inside the frame, trimming as necessary to fit (Figure 1). Lightly press the plants into the clay with your hand when you are finished. Remove the frame.
Using a rolling pin, press the plants into the clay. Remove the plants. Replace the frame on the clay and press it down firmly to make a seal because the frame must contain the liquid plaster. Impress the clay with your personal mark or stamp if you have one.
Weigh out the plaster into a plastic bowl according to the ratio on its container. I use an OXO kitchen scale. Weigh the water into a separate rubber bowl. This will be the bowl in which you make the plaster mixture. I wear a mask and gloves for this step because I’m sensitive to fine particles these dry mixtures give off when mixing and measuring.I became a student of plasters and concrete as I taught myself this process. You will too. You are looking for a casting material that has a PSI mean (pounds per square inch) over 6,000. Simple plaster of Paris has a PSI of 2,000. That is why the casts you probably made in school soon turned to dust: they didn’t have the strength to hold together. I use Ultracal at 6,000 PSI for concrete tiles and Dein’s choice of Crystacal R dental plaster (we all know what that tastes like!) at 8,000 PSI.
While stirring, slowly pour the plaster into the water. When fully mixed and lump free, pour the liquid mixture into the frame.
Leave the tile undisturbed for as long as possible, at least two hours. It will feel warm to the touch as it cures. After at least two hours, peel off the clay and push the tile out from the frame. See Fig. 2.
After the tile is fully dry, usually after a week, sand rough edges with a finish sanding block.Experiment with the process to find your own compositions. Tinting the plaster is a subject for another day as, again, it’s easy to add color to a tile, but hard well. Google images of “tinted plaster tiles” and you’ll see what I mean. I’d love to see your own tiles!
To see more of Sue Fierston’s work, visit her on Instagram @suefierston and on her website.
Sue Fierston was the Nature Printing Society’s president. She is currently the society’s acting president.
Botanical tile making supplies: Freezer paper, Picture frame, Soft clay, Vaseline, Tweezers, Rolling pin, Plastic bowl, Rubber bowl, Casting material such as dental plaster Optional: mask and gloves
Fig. 1: Lay material in the frame, trimming to fit.